
How to give more engaging presentations on Zoom
Even though we're in lockdown and all on Zoom, leaders still need to talk to slides for client pitches or internal updates. Here are some tips to make Zoom presentations more engaging...
Whenever I give a presentation, I get asked to share how I delivered the session itself. In these times of Zoom, leaders are always looking for how to be a bit more professional, and create that bit more connection and humanity in their communications while we can't all be in the same room. So I decided to share what I've learned in this post.
In most of my presentations I need to share a lot of detailed information, so I need slides to support that.
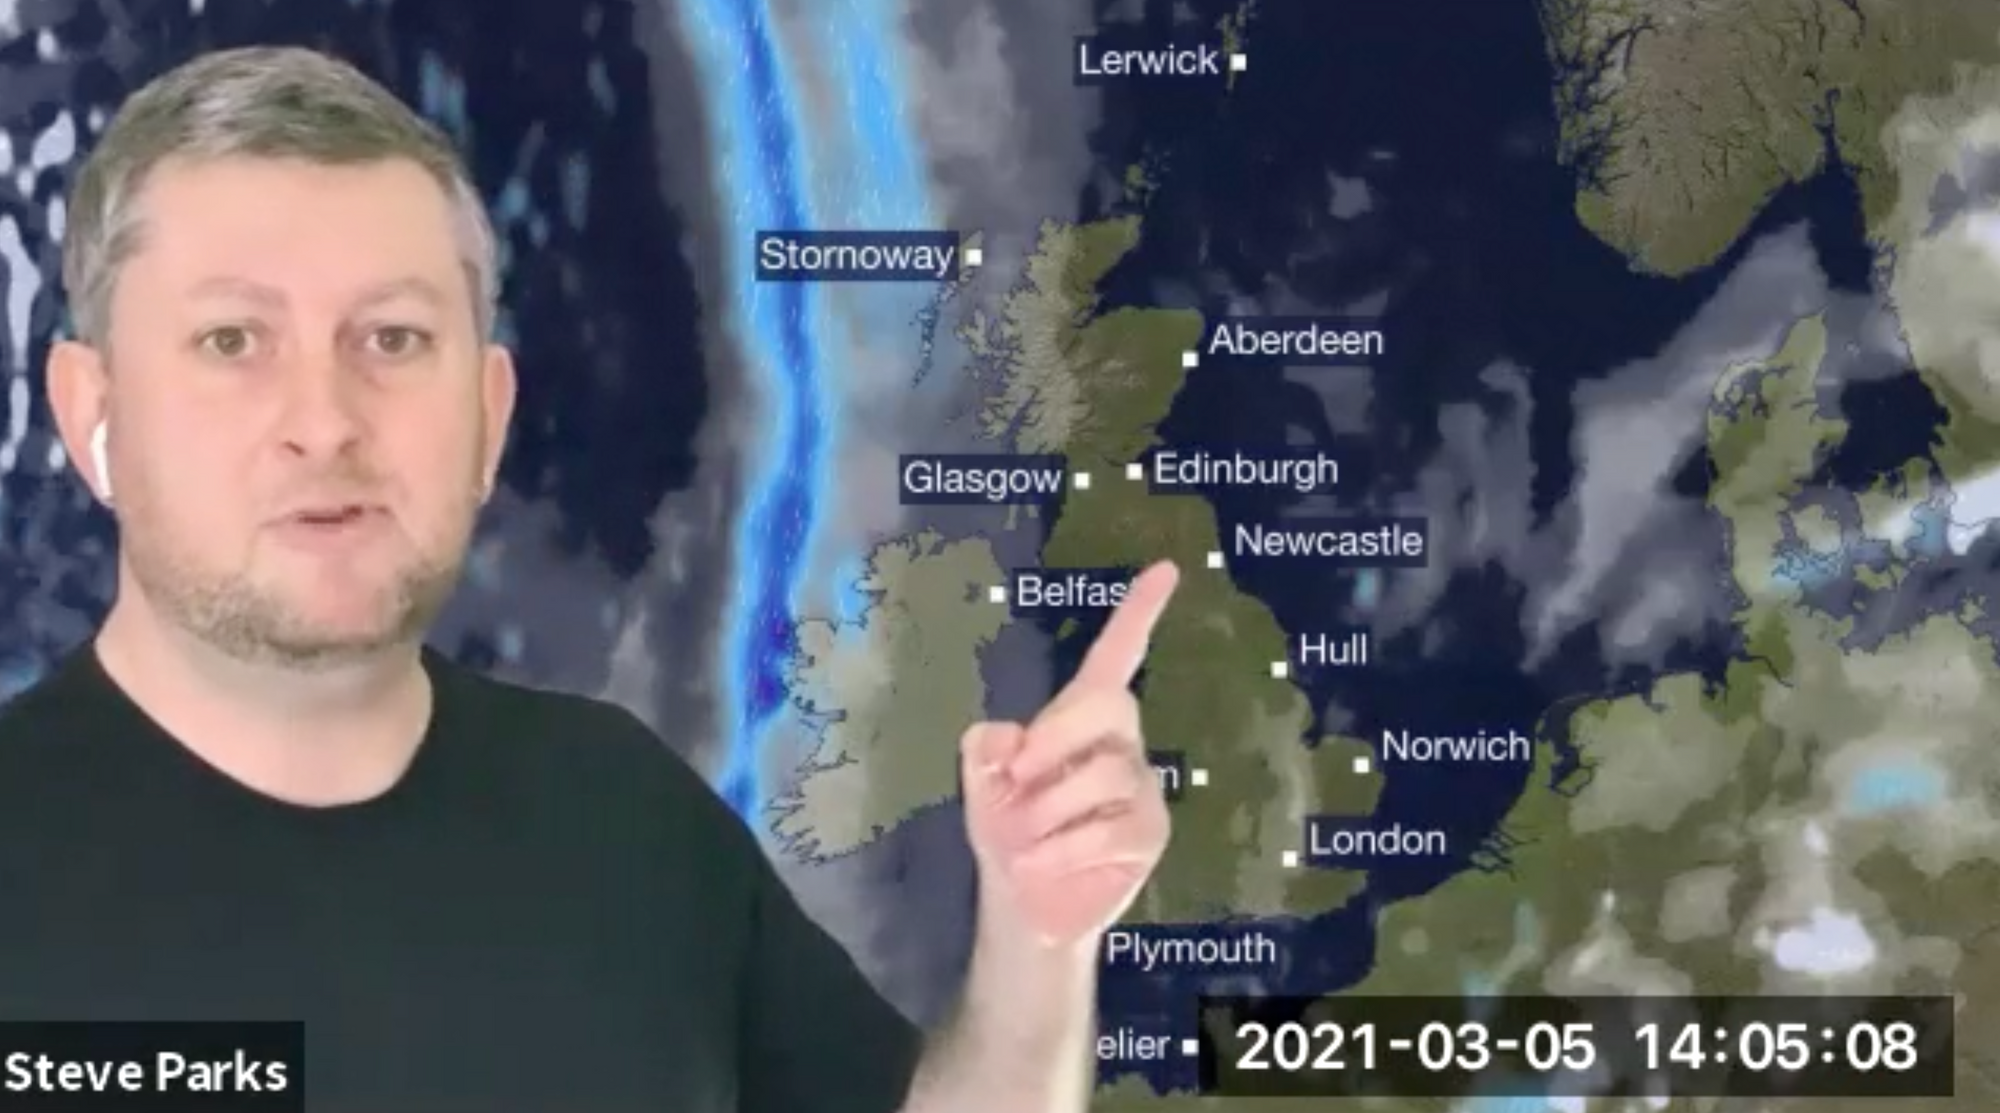
I didn't want to start the slides in screenshare and then not have people able to see me as the presenter — that makes the majority of the session feel less human, less connected. I wanted to be on screen like Emily Maitlis on election night or a weather presenter.
This needs a good camera and lighting set up, a green screen, and something to process the chromakey effect. So here's how I do it, in a very simple and cheap way.
The equipment
I present sessions from my small home office, and need to be able to quickly set this up and take it down as needed (and carry it around).
Green screen
The first thing is a green screen. I have a portable one from years ago that has served me well, it's one of those that stores as a small circle and magically pops up into a big rectangle (packing it back up requires a bit of a knack). You can get a decent one for about £50. You can also paint the wall behind you, or just hang a cloth of the right colour..
Once it was popped up, I put it on top of some chairs from the dining room behind me, leaning against the bookcase. That ensures it's at the right height to fill the area on screen behind me. You can get stands, but I'm keeping this as cheap and portable as possible — it only needs to be professional on camera, it can be amateur behind the scenes.
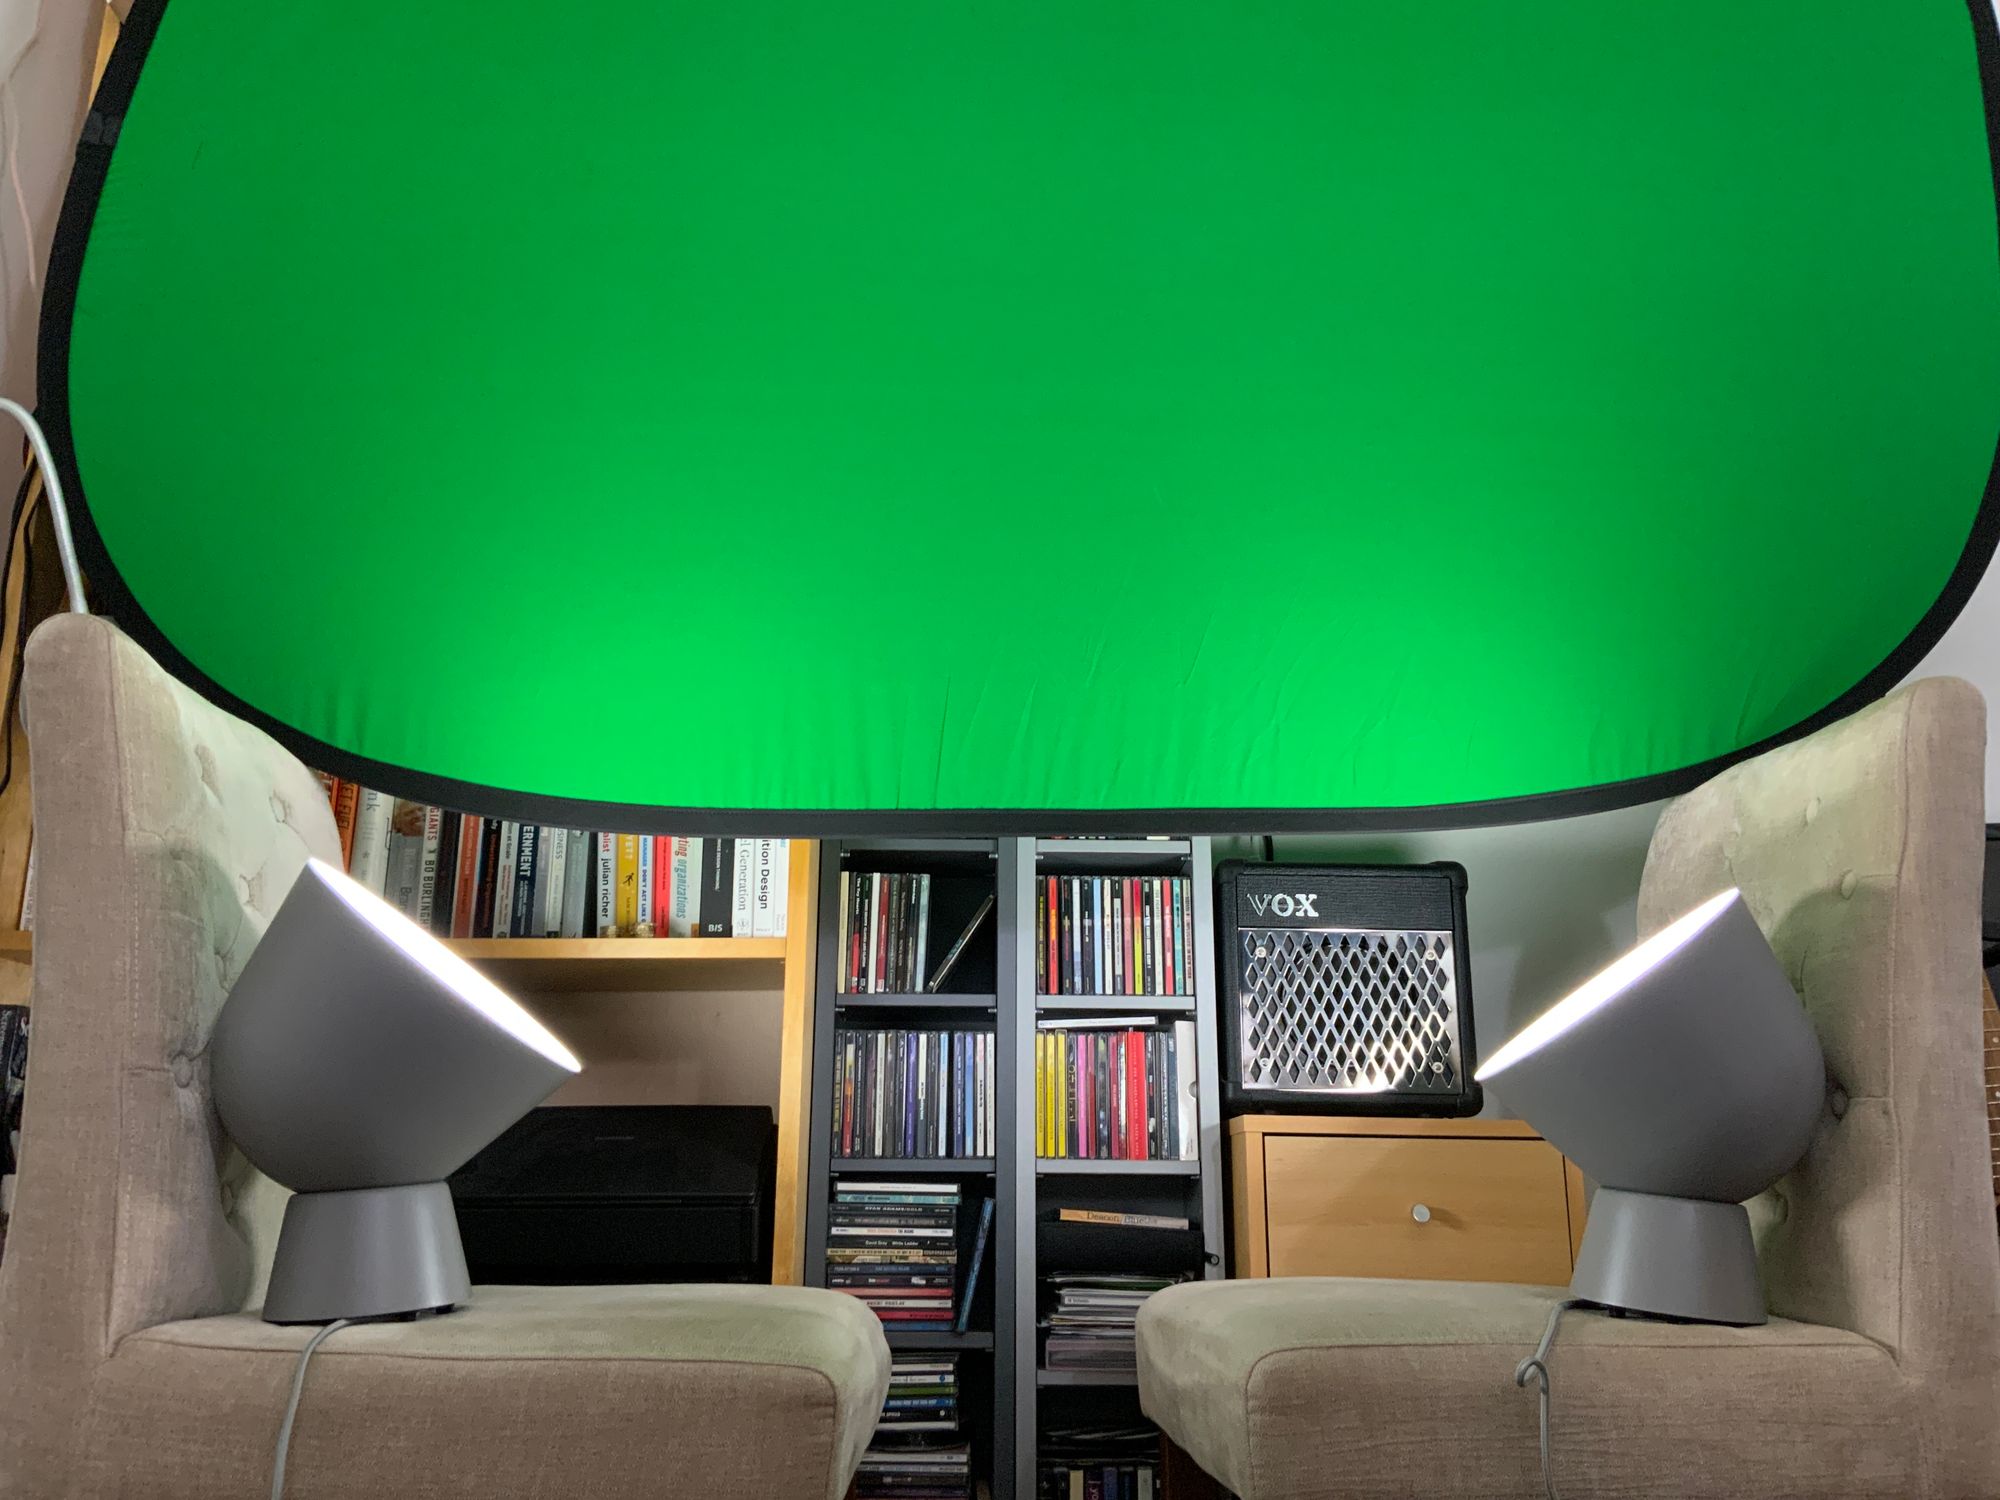
Backlights
Below the green screen, in my first setup, I had two PS2017 uplighter lamps from Ikea (£25 each). They already have diffuser covers to give a nice wide distribution of light. I put Philips Hue bulbs in them, so I can control the colour and the colour temperature, and they act as nice feature lights in my office when I'm not using them for this, so I don't have to store them away. I set them for a bright daylight white.
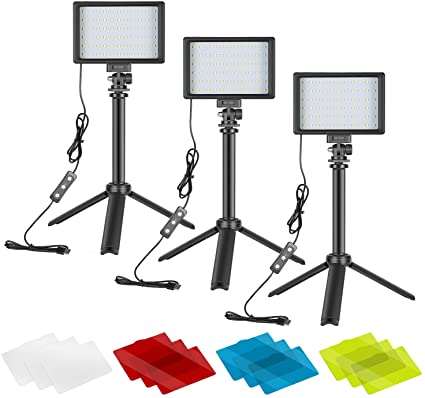
(Update: I now have a portable lighting kit, which is the Neewer 3-piece 5600k LED video lighting kit, £53)
The aim is that these light the green screen fairly evenly, to help the software see it well for the chromakey effect, and so that my shadow on the screen isn't an issue.
Notice that I don't have the lights directed totally backwards to point only up at the green screen though. It's useful that they also light me from each side at the back, because that helps make my edges more defined for the software (in lighting terms this is known as a 'rim light' but no dirty jokes at the back please). It also helps reduce the impact of any green reflection on me from the light on the green screen.
In a better set up you'd have lights dedicated to the green screen, and then you'd have a light above you and behind you, to light your hair and side of your face.
Key light
The next light you need is what's known as a 'key light'. This is the main light on your face. You want it slightly above you and at an angle of about 30-45 degrees.
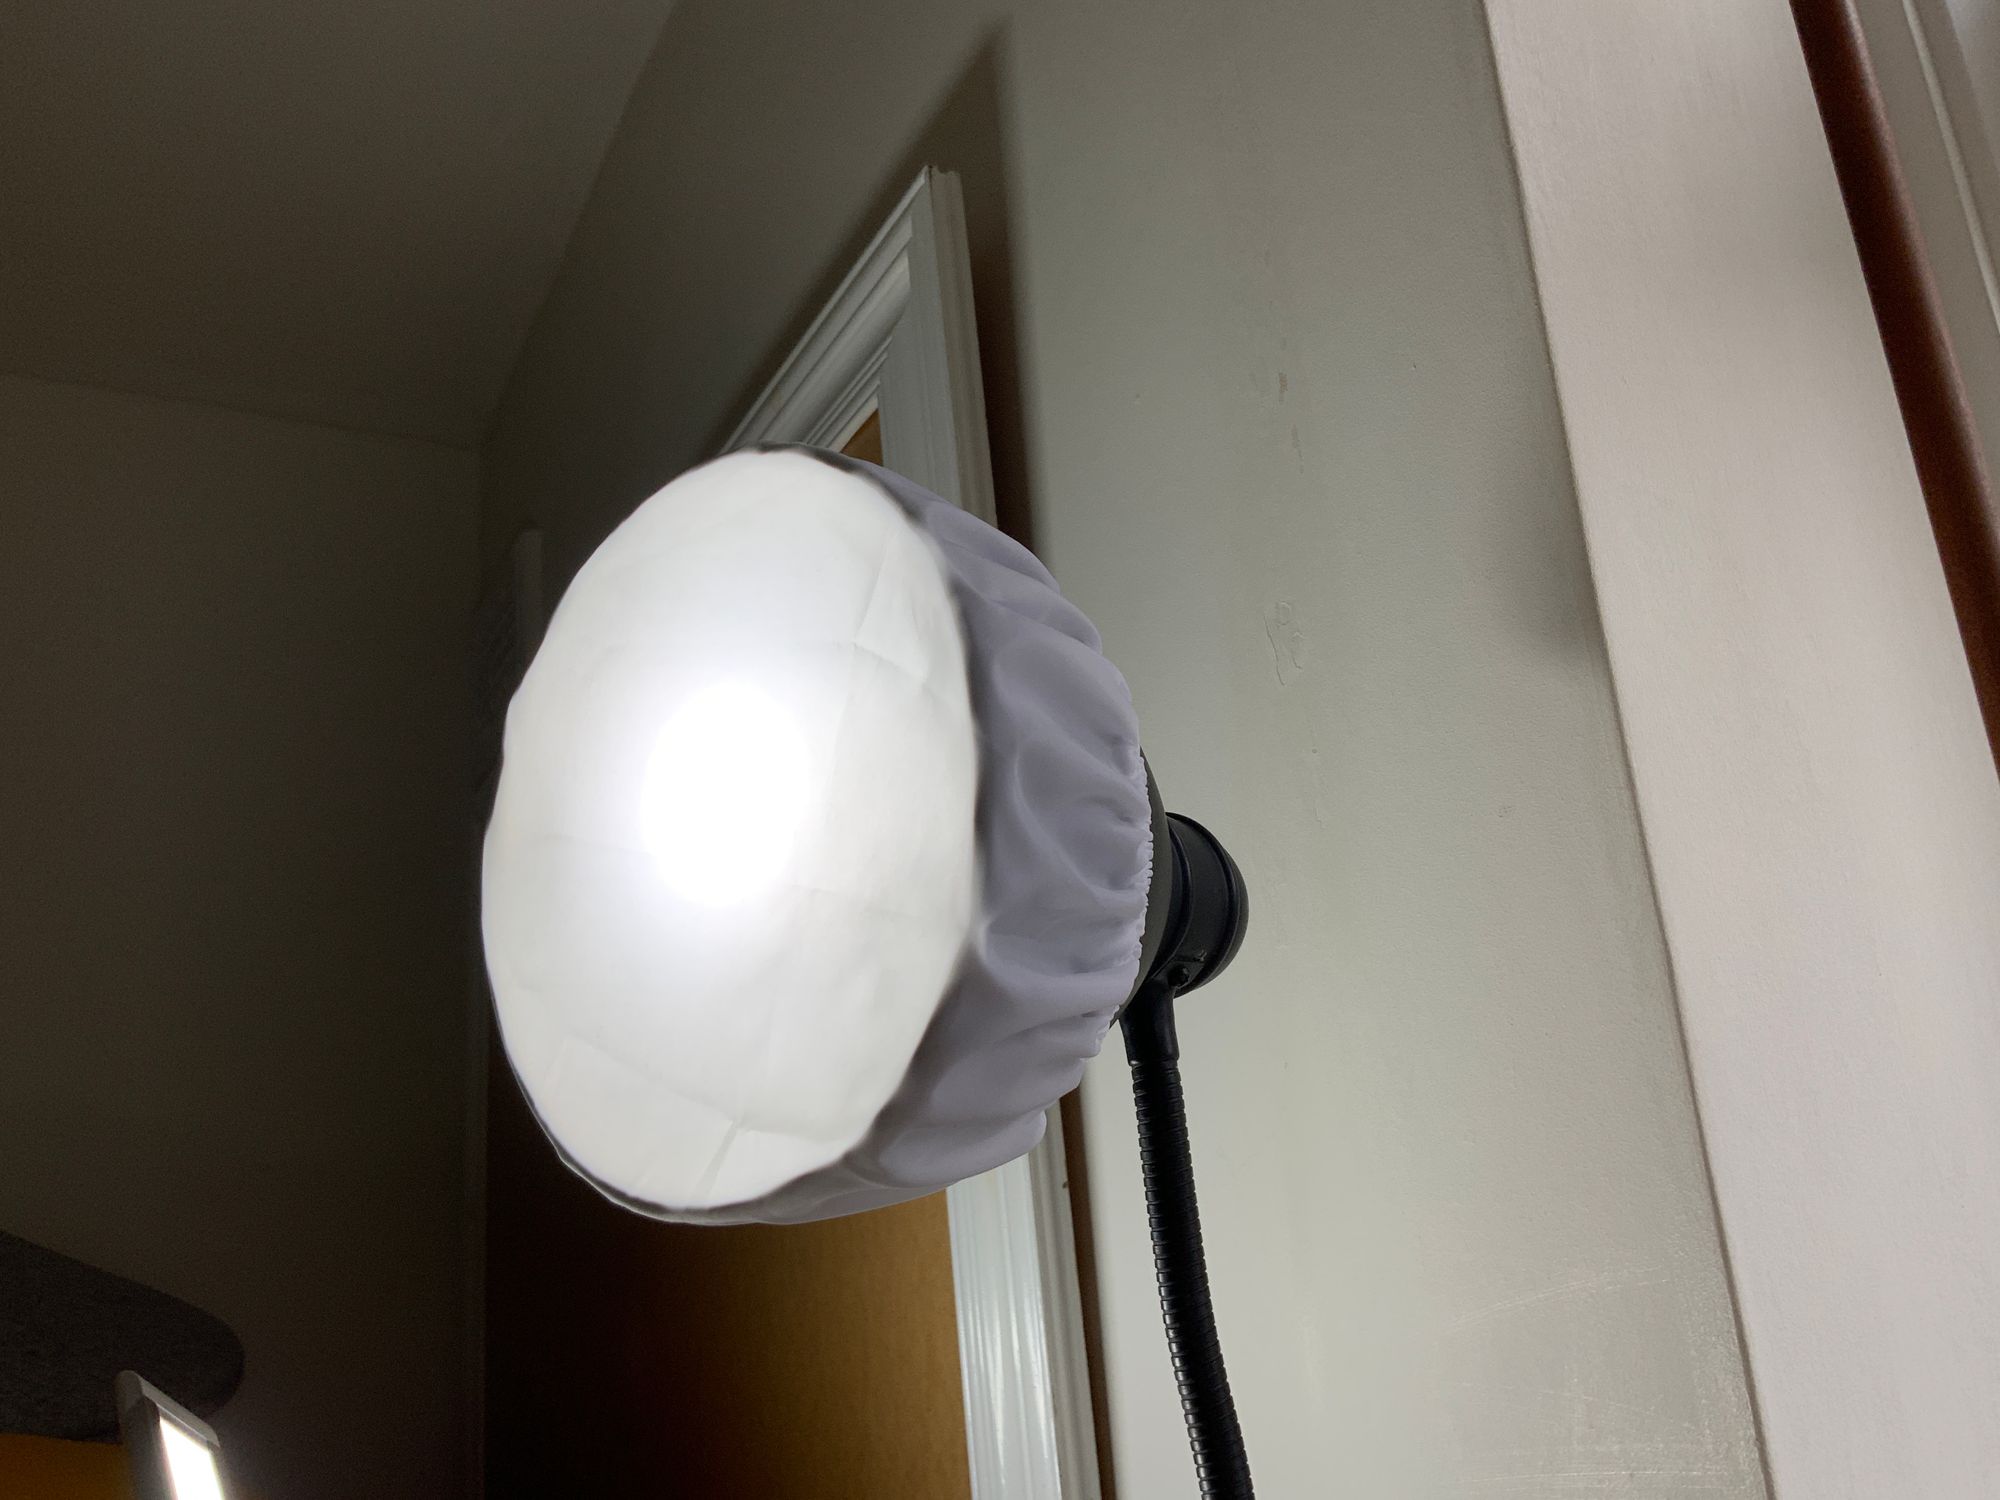
In the original set up I had a floor-standing Ikea lamp (that is very old and I don't think is in their catalogue anymore). Again, it has a Philips Hue bulb, set to a daylight white. I've added a Neewer diffuser sock (£12 for two) to avoid glare and give an even light on me (you can even put both diffusers ontop of each other)
But since the first post I upgraded my key light with an entry-level professional light and softbox, because I realised my professional life was now going to be largely on screen. You don't need to save many travel costs to make a decent setup worthwhile.
The light I picked was the Godox SL60W for £118, with a lightweight Neewer softbox for £35. It's cheap for a pro light, but the downside is the fan is always running rather than coming on just when needed, and it is quite noisy. You may want to pay more to avoid this.
Fill light
On the opposite side of you from the key light, you want an even softer, dimmer light, just to fill out the shadows on your face a little. For this I have another of the IKEA uplighters (or now, one of the Neewer lights). I reflect this off the wall that's on that side of me.
Sound
The sound is actually a key part of what can make your meetings and presentations less tiring for other people. Too often we spend our days listening to tinny compressed audio that's slightly overdriven, and it's exhausting us without realising. A clear voice on good quality audio strikes people as a breath of fresh air.
I'm from a radio background, so have some good audio gear. I use a Sennheiser MKR600 shotgun mic (£240), with a Focusrite Scarlett 4i4 mic preamp (£194), connected via USB-C to my Macbook. You can still get good results with cheaper kit — for example, the Rode VideoMicro for £44 is a good entry-level option.
The shotgun mic is ultra directional, and designed so you can have it out of view. You don't need to be one of those guys (and it is guys in my experience) with the massive microphone obscuring their face. The tech should be invisible to people watching you.
To hear what is happening on the call I tend to just use one of my Airpods. Using earbuds avoids echo on the call between your speakers and your mic when other people are speaking.
Camera
For the camera, it's important to have a good one so the software gets a high-resolution, crisp image in order to process the green screen effect. Normal webcams are okay-ish, but you'll often end up with bits of green around you, or bits of you disappearing.
Many people have spent lots of money on DSLRs and so on to get broadcast quality shots with snazzy bokeh effects. With a green screen you're not looking for those kind of focus effects — you just want a crisp focus. I went the cheaper route and spent £35 on Camo, an app that lets you use the camera on your iPhone as a webcam. The cameras on recent iPhones are excellent, so this works well.

I set it to use the 2x telephoto lens on the back of the phone, which allows me to have the phone on a tripod behind my screen, and for me to stand a reasonable distance away. It also helps ensure the green screen fills the screen area.
My colleague Joe has had great results with a more advanced webcam, the Logitech Streamcam (£74).
The camera being just above my screen, and me a reasonable distance away, also means that I can see the post-chromakey processing video stream, so can see where I'm pointing, while also seeming to look roughly at the camera.
The software
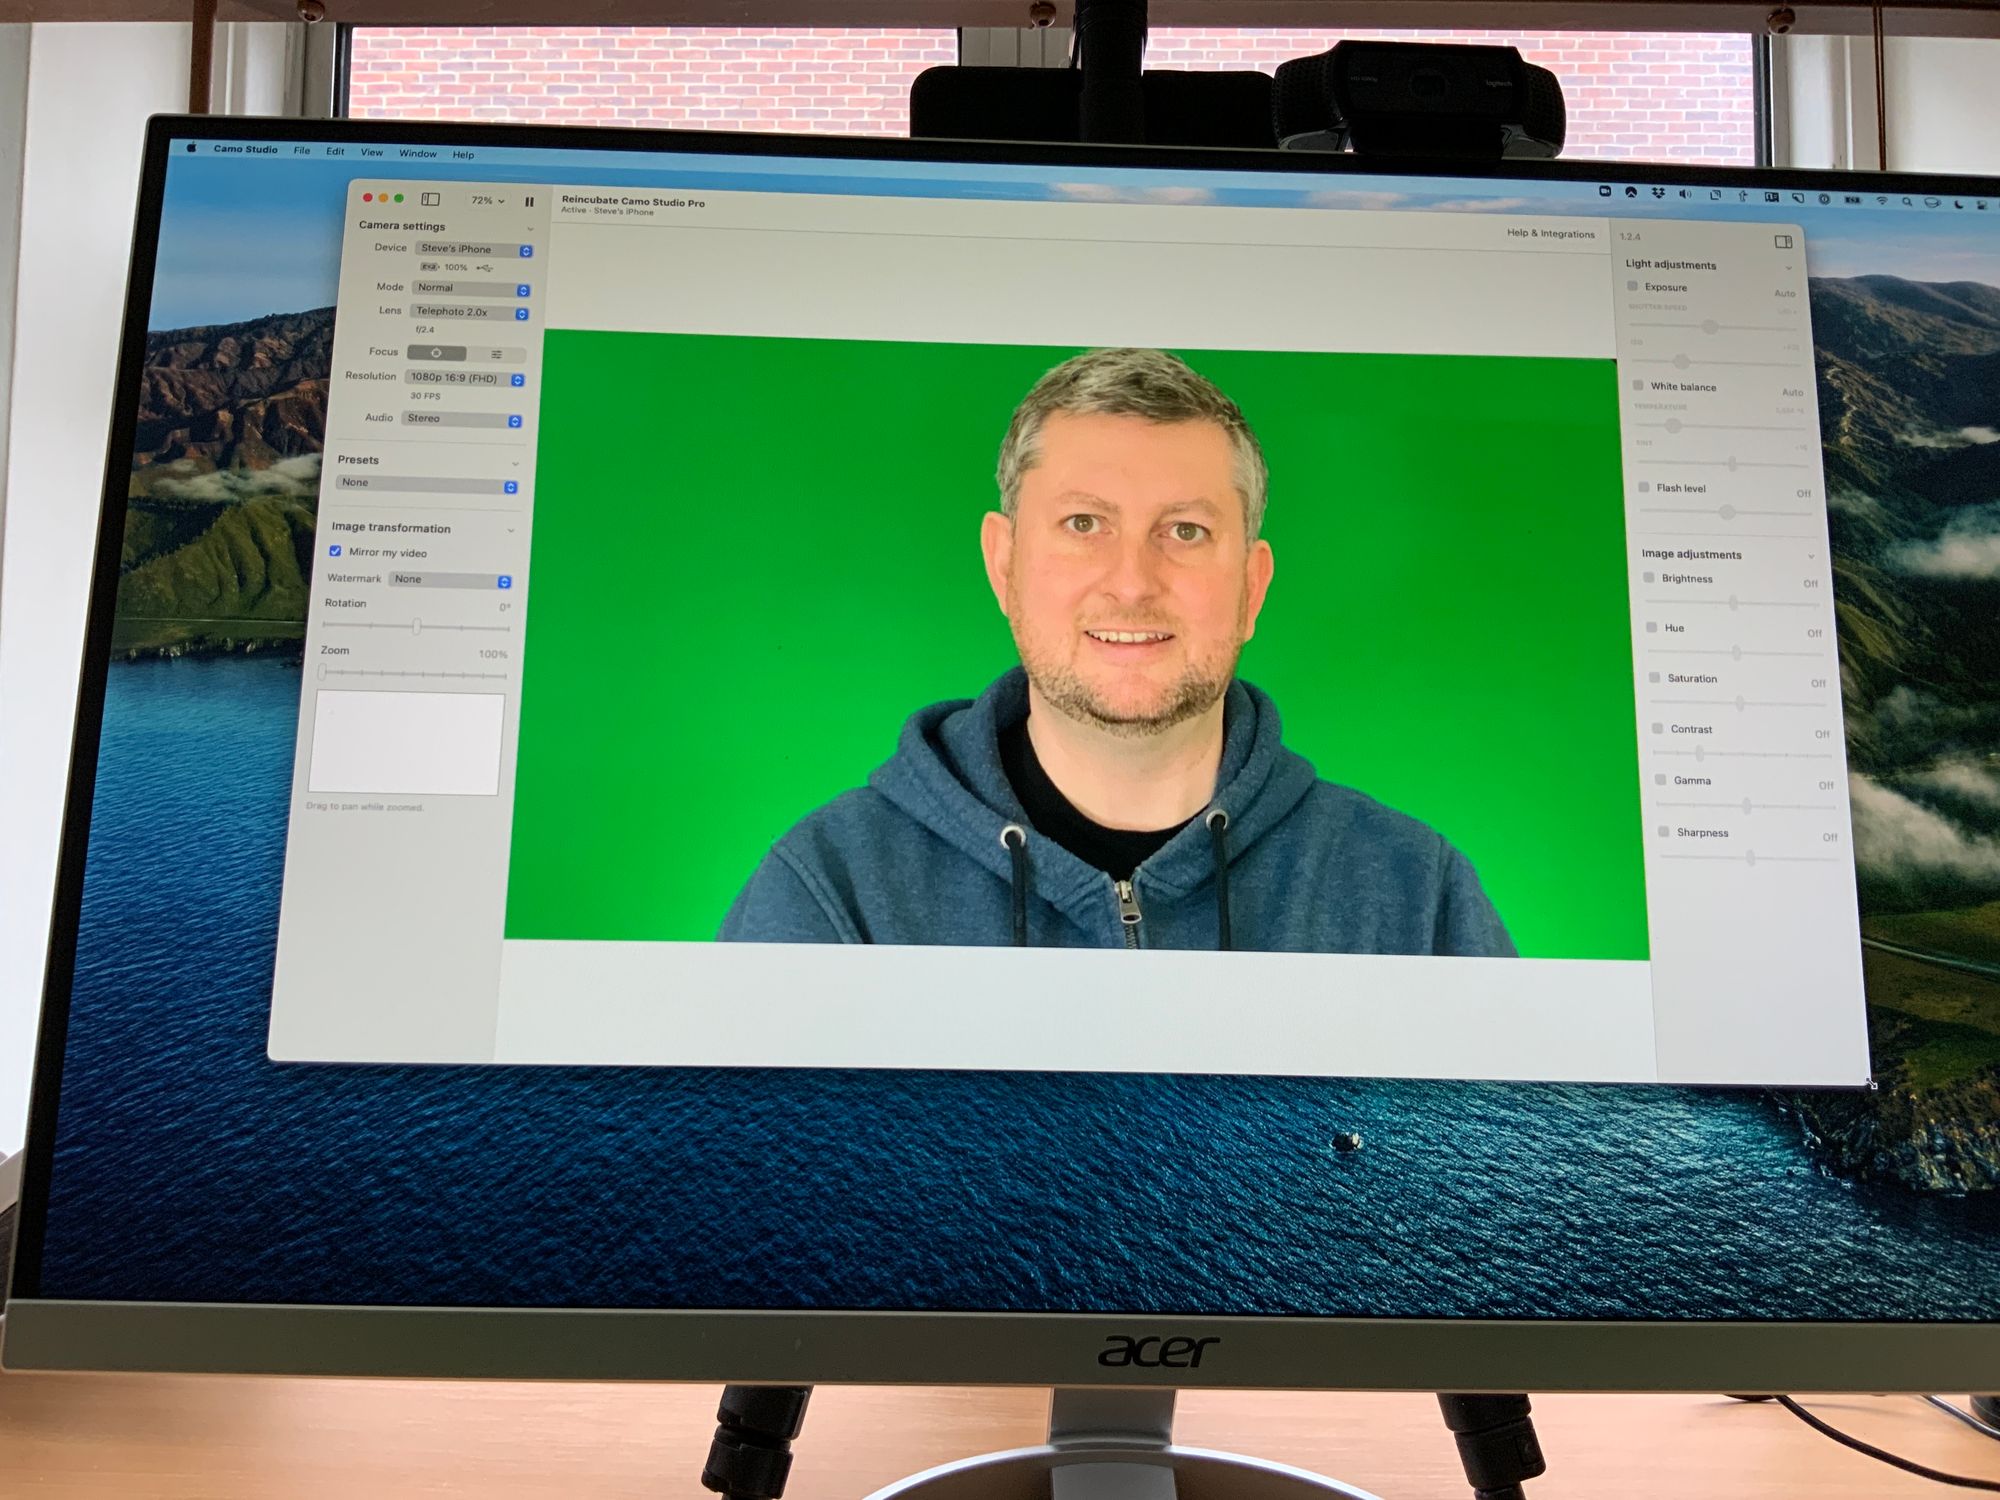
As well as its iPhone app for capturing the camera feed, Camo has a desktop app to receive the feed, adjust it, and send it to whatever app you want to use it in. To Zoom it looks just like it's a webcam attached to your computer, and can be selected in the same way.
Note in the image above how the edges between me and the green screen are well-lit and clearly defined, and there's no strong shadow of me on the green screen. (Reminder - don't wear anything with green in it!)
Like most video calls these days, the session was going to be on Zoom. To make this work you need to be on the latest version (and make sure the session host is too).
Then, in Zoom, you'll see the feed from Camo, like this:
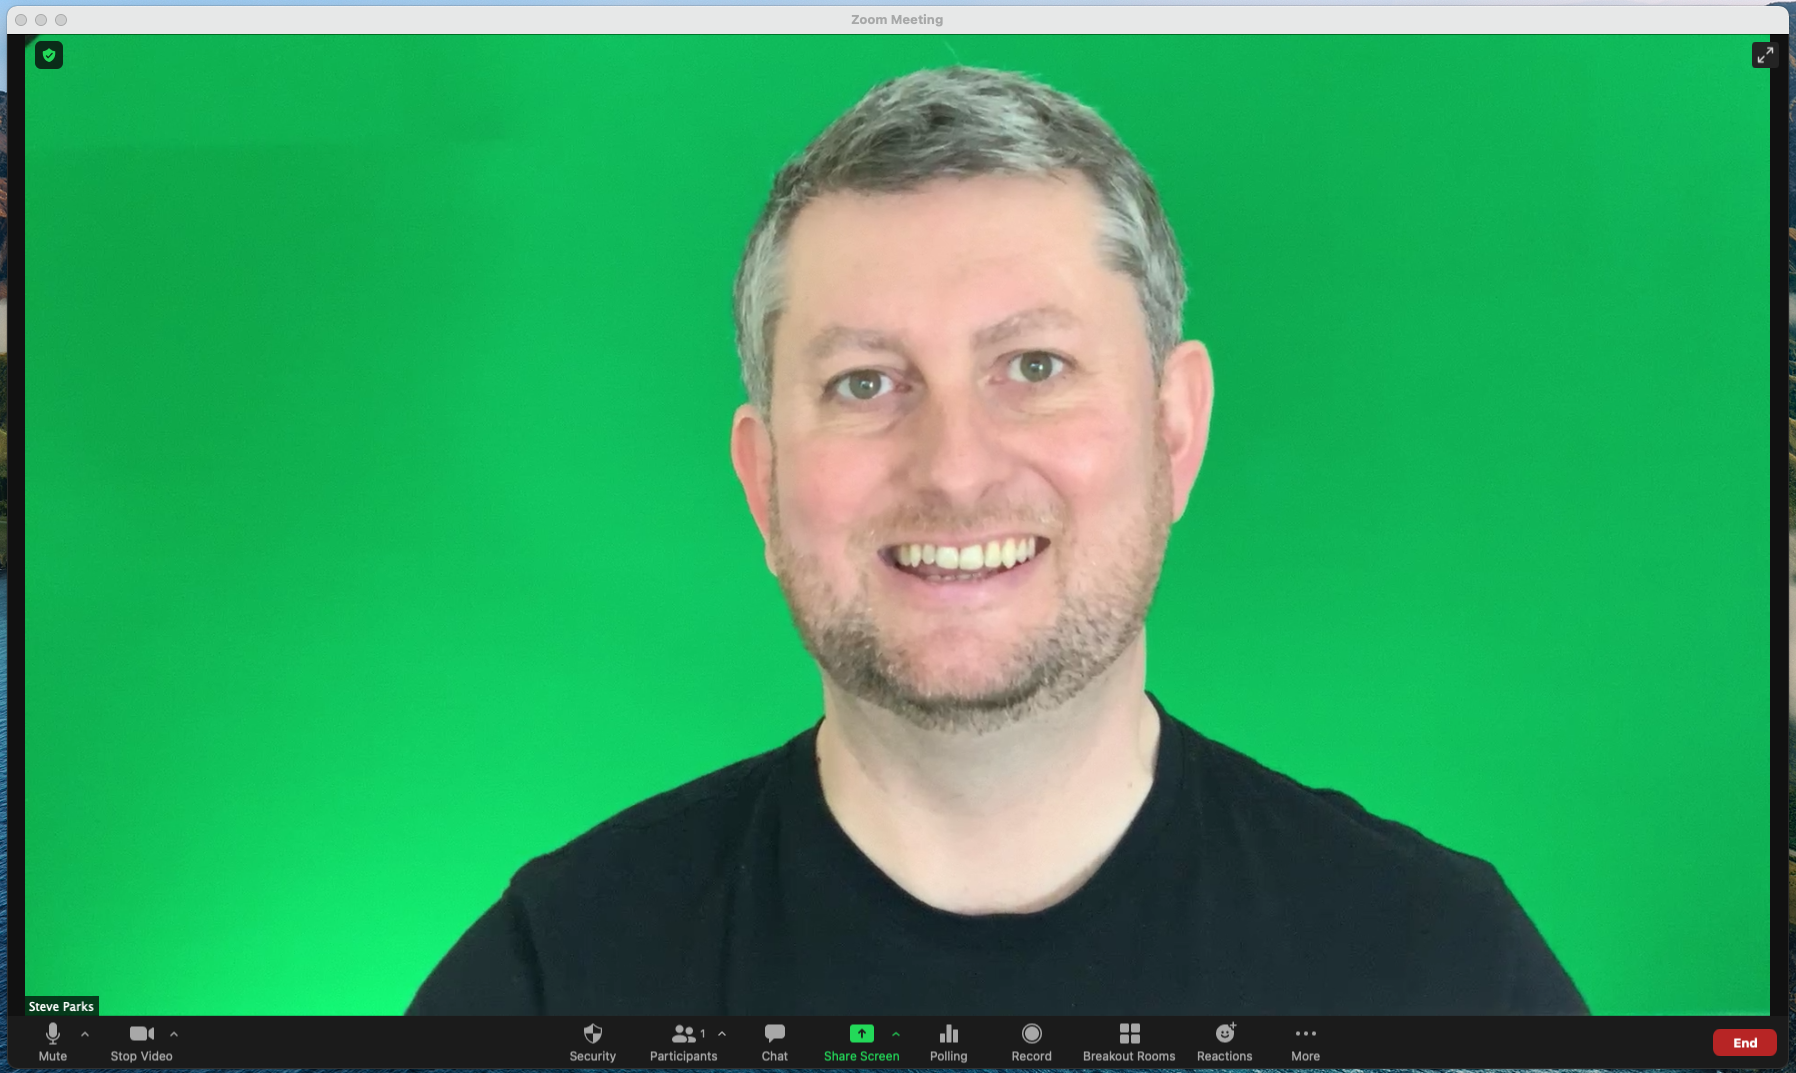
It's not quite as crisp, because Camo was in 1080p HD, and Zoom drops that to 720p HD, but at least you know you're giving Zoom as clear an image as possible.
While in Zoom, on the menu bar at the top of the screen select the 'zoom.us' menu, and then the Preferences option. Click on the tab for 'Background and Filters' and at the bottom of that pane tick the option for 'I have a green screen'.
Now we just need the slides to go behind us. At the bottom of the screen you'll see the 'share screen' button...

Click that, and select the 'advanced' tab, then the option for 'Slides as Virtual Background'...
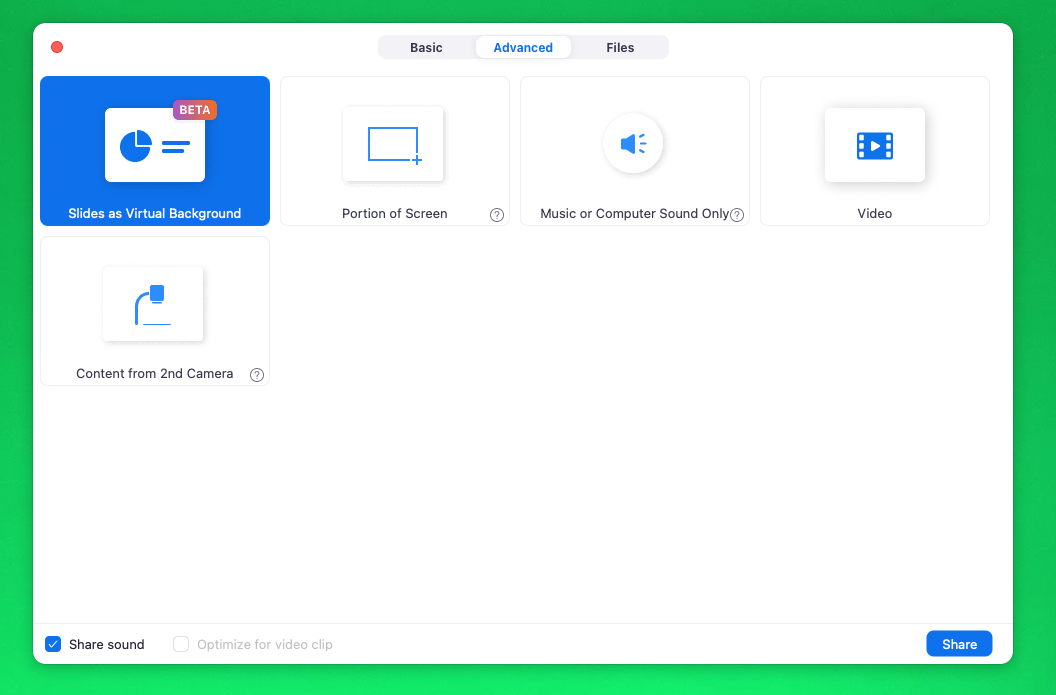
This will ask you to select a Keynote or Powerpoint file from your computer, then process it and display it behind you...
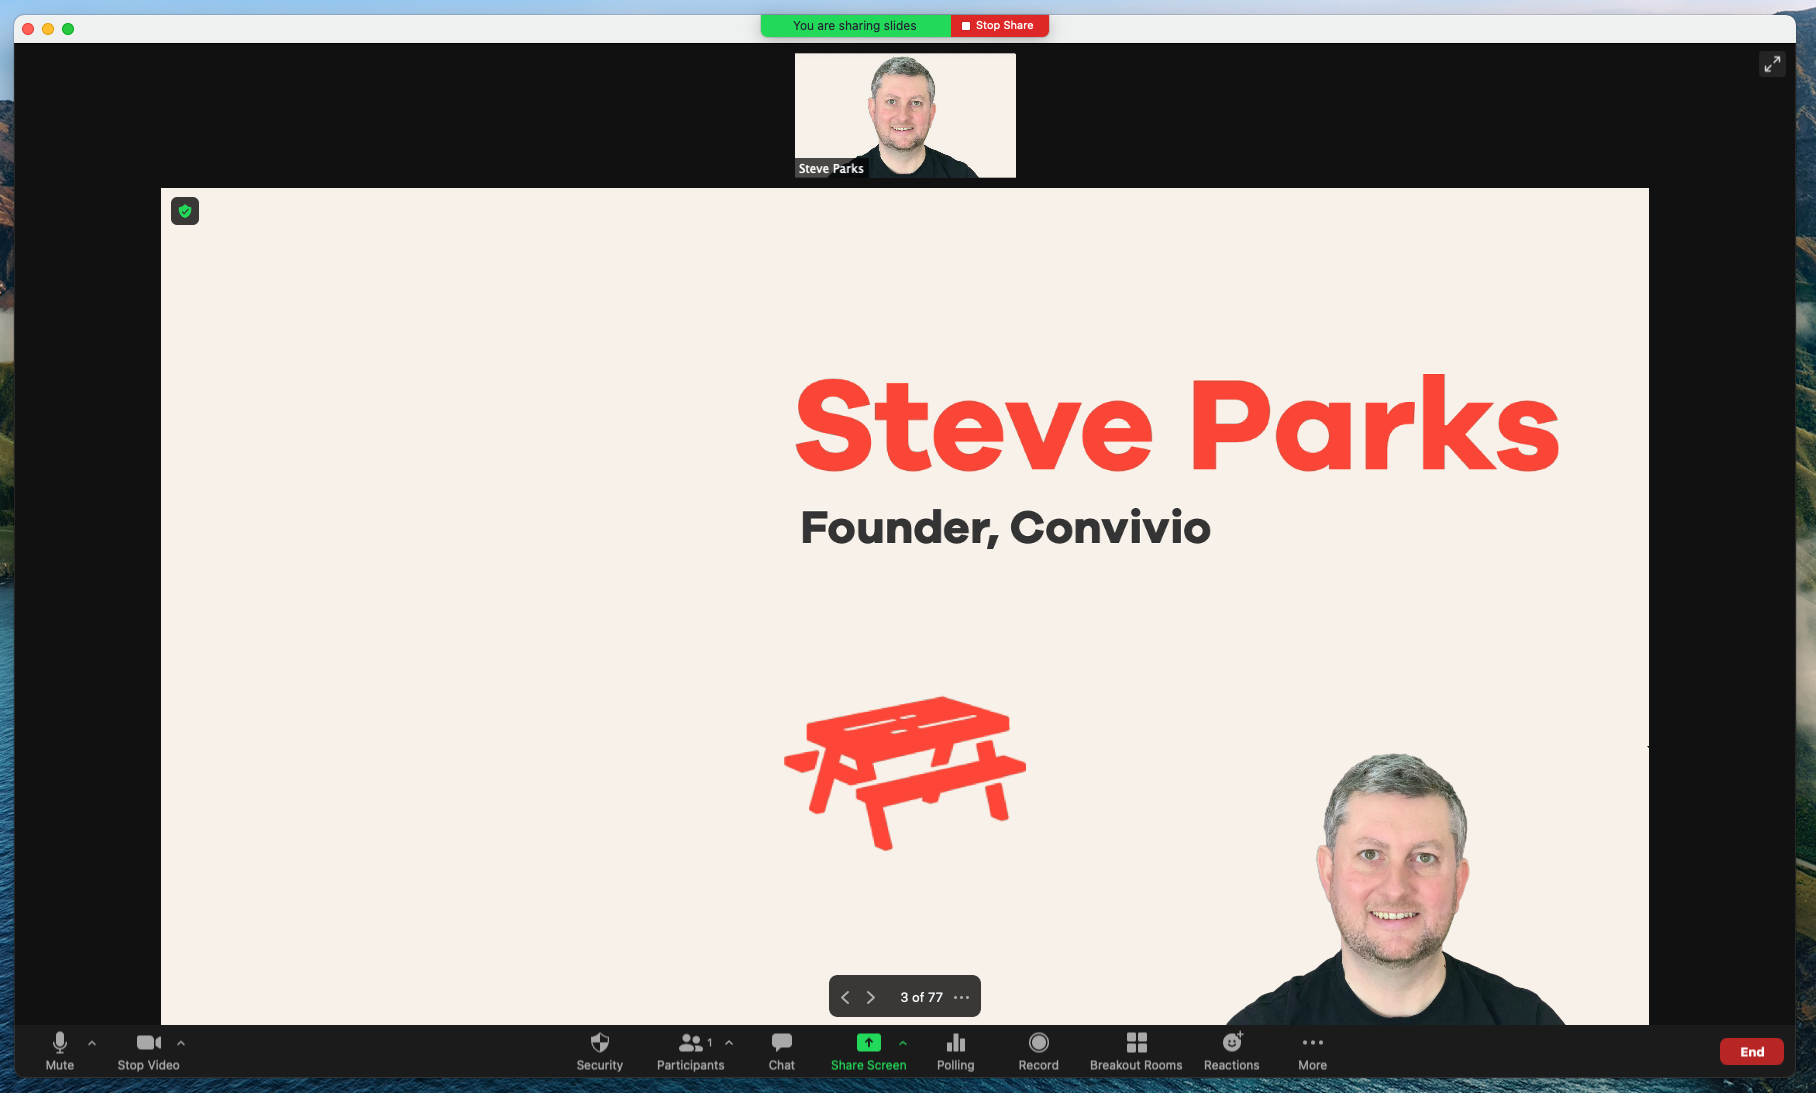
At first it shows you just in a little area at the bottom right of the screen. You can click in that area and resize the overlay box to cover the full screen. That then puts you into weather presenter mode...
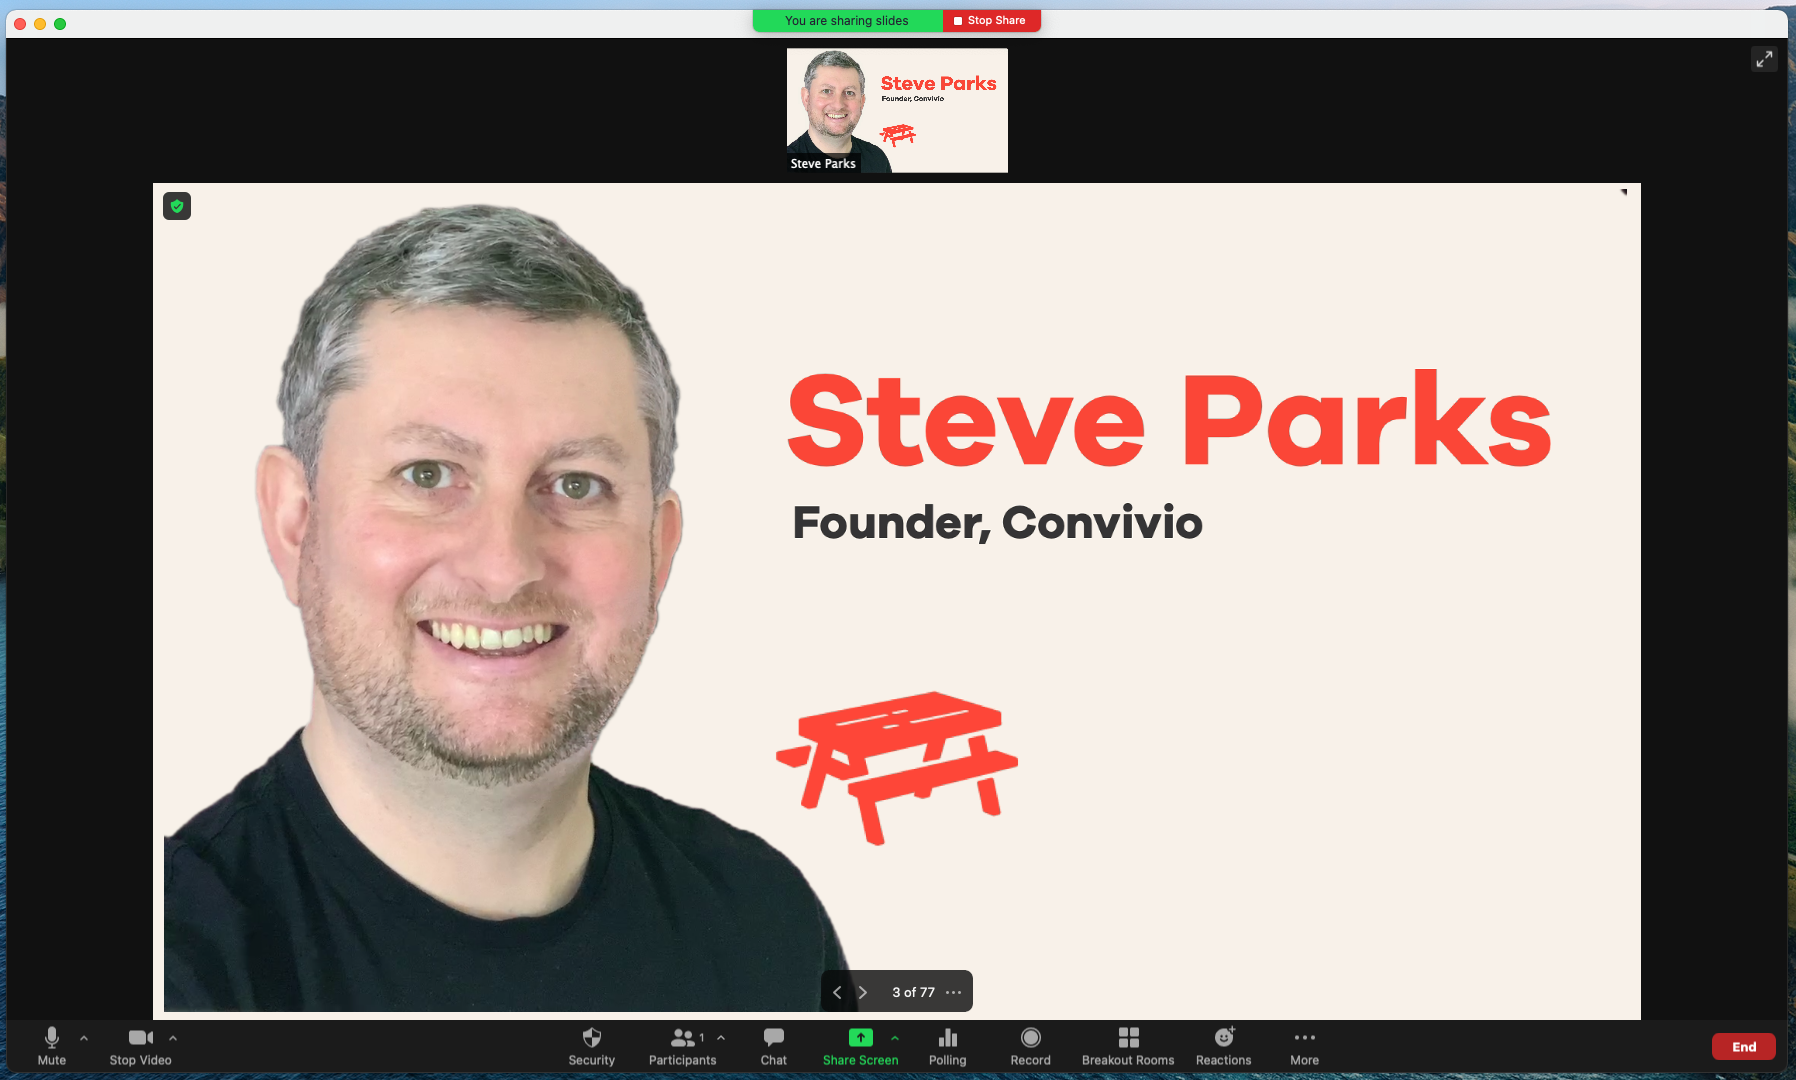
Adjust the camera and your own position so that you are shown as a 'head and shoulders' with your eyes about a third of the way from the top of the screen, and not cutting off the top of your head.
Notice how the light on my face is slightly to one side, giving some shade and depth, but I'm reasonably brightly lit without being too shiny. It'll take a bit of adjustment and experience to get used to not over- or under-lighting yourself.
You can then change slides using the little arrows near the bottom of the screen in Zoom:

Unfortunately slide changing remotes don't work with this control, you have to actively click with the cursor. I used my bluetooth trackpad, holding it in one hand and tapping with the other when I wanted to change slide.
The slides
To work on Zoom, the slides to be in either Keynote or Powerpoint. Unfortunately this trick doesn't yet work with Google Slides or anything else.
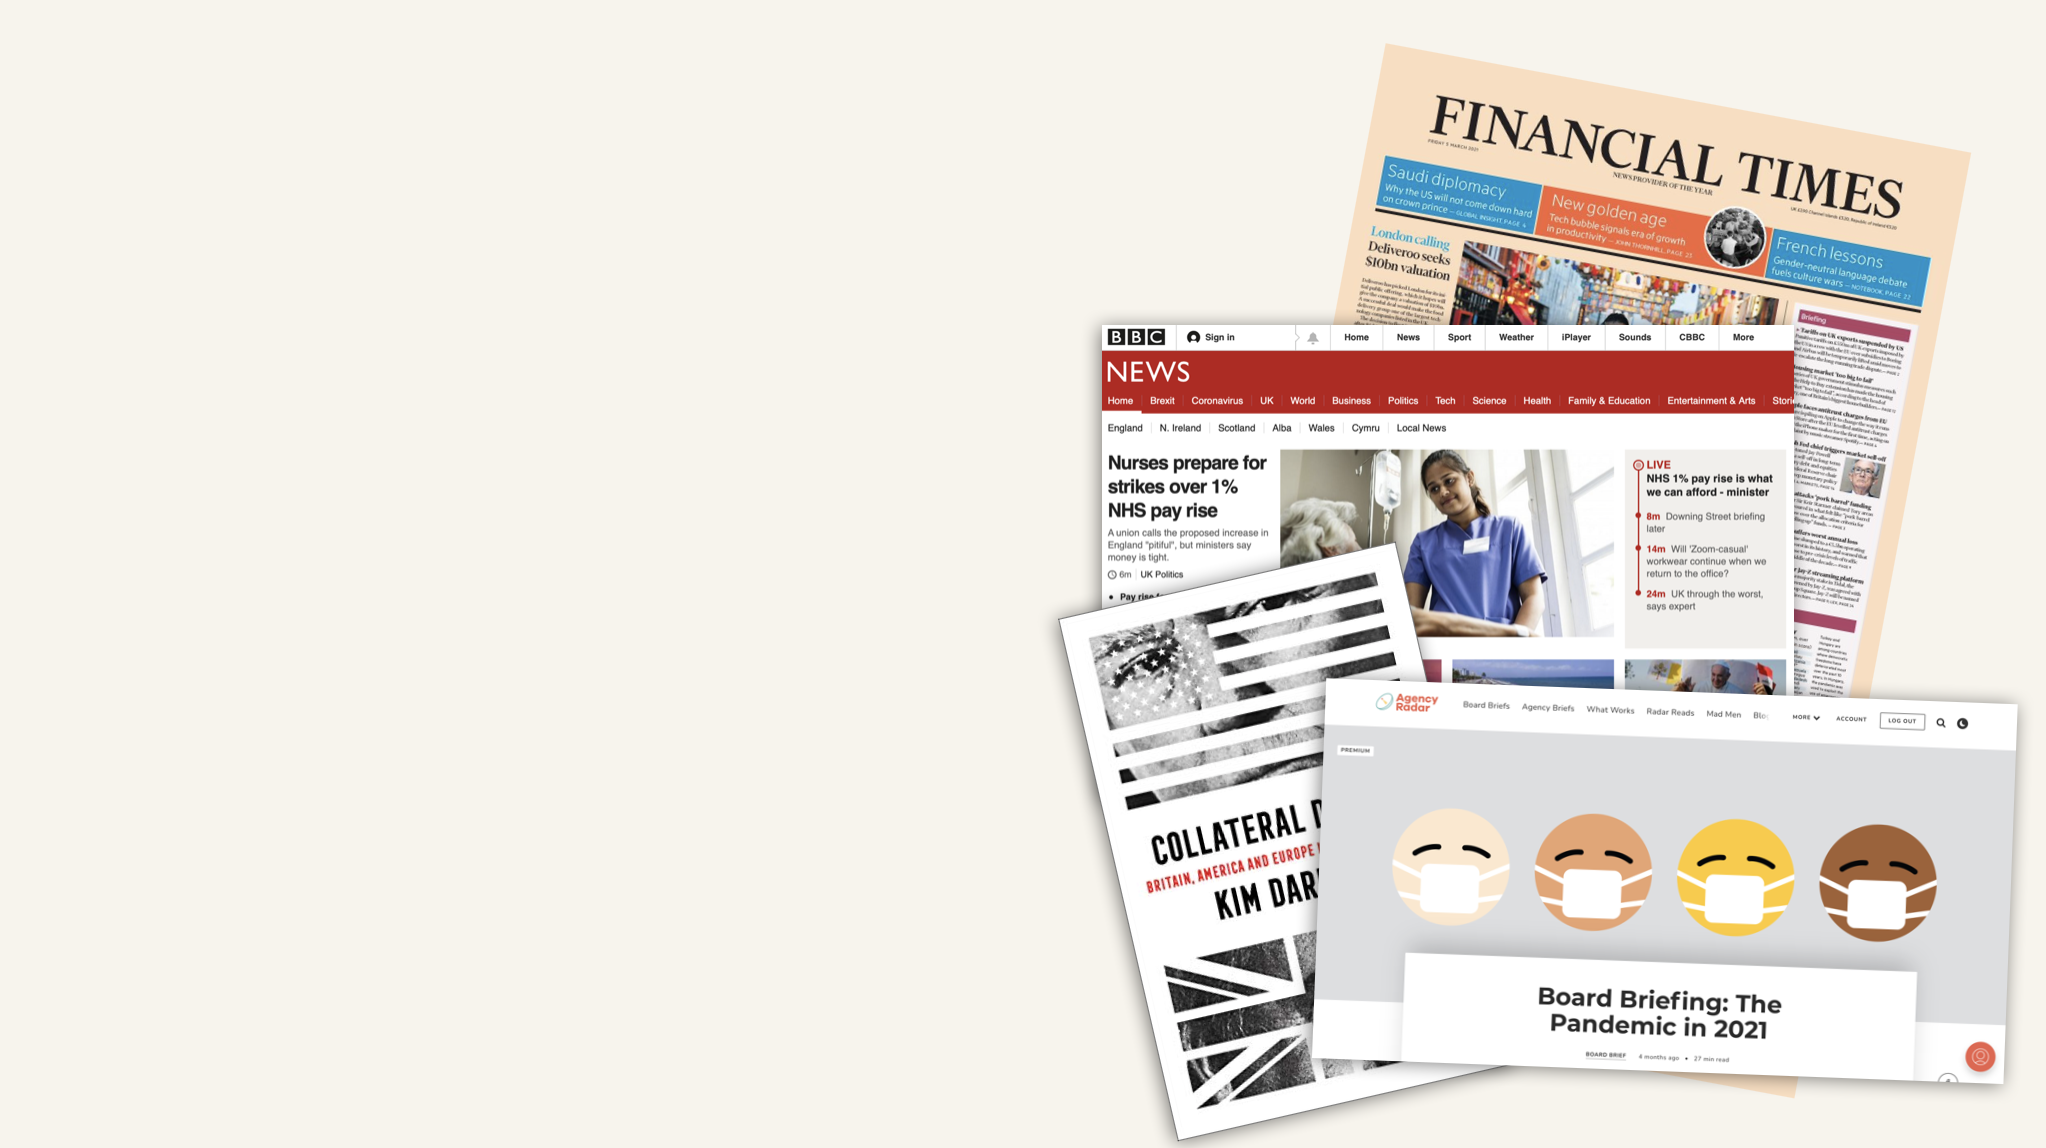
In designing the slides, pick background colours that you and your clothes will not clash with or blend into.
Make sure to leave room in the design of each slide for you to stand at either side of the screen. That means text should only be on one side of each slide, and photos should have the dominant part of the image to one side.
It's good to vary which side you stand on a little bit, but you don't want to be hopping around too much. Have a dominant side you will mainly be on (generally best as the left hand side of the screen for the viewer), but then have a few groups of slides where you move to the other side for a bit.
It means most of the slides will look like these, with a blank area on one side:
The end result
Putting all of this together results in this (stills from a video recorded of the session by the organisers)...
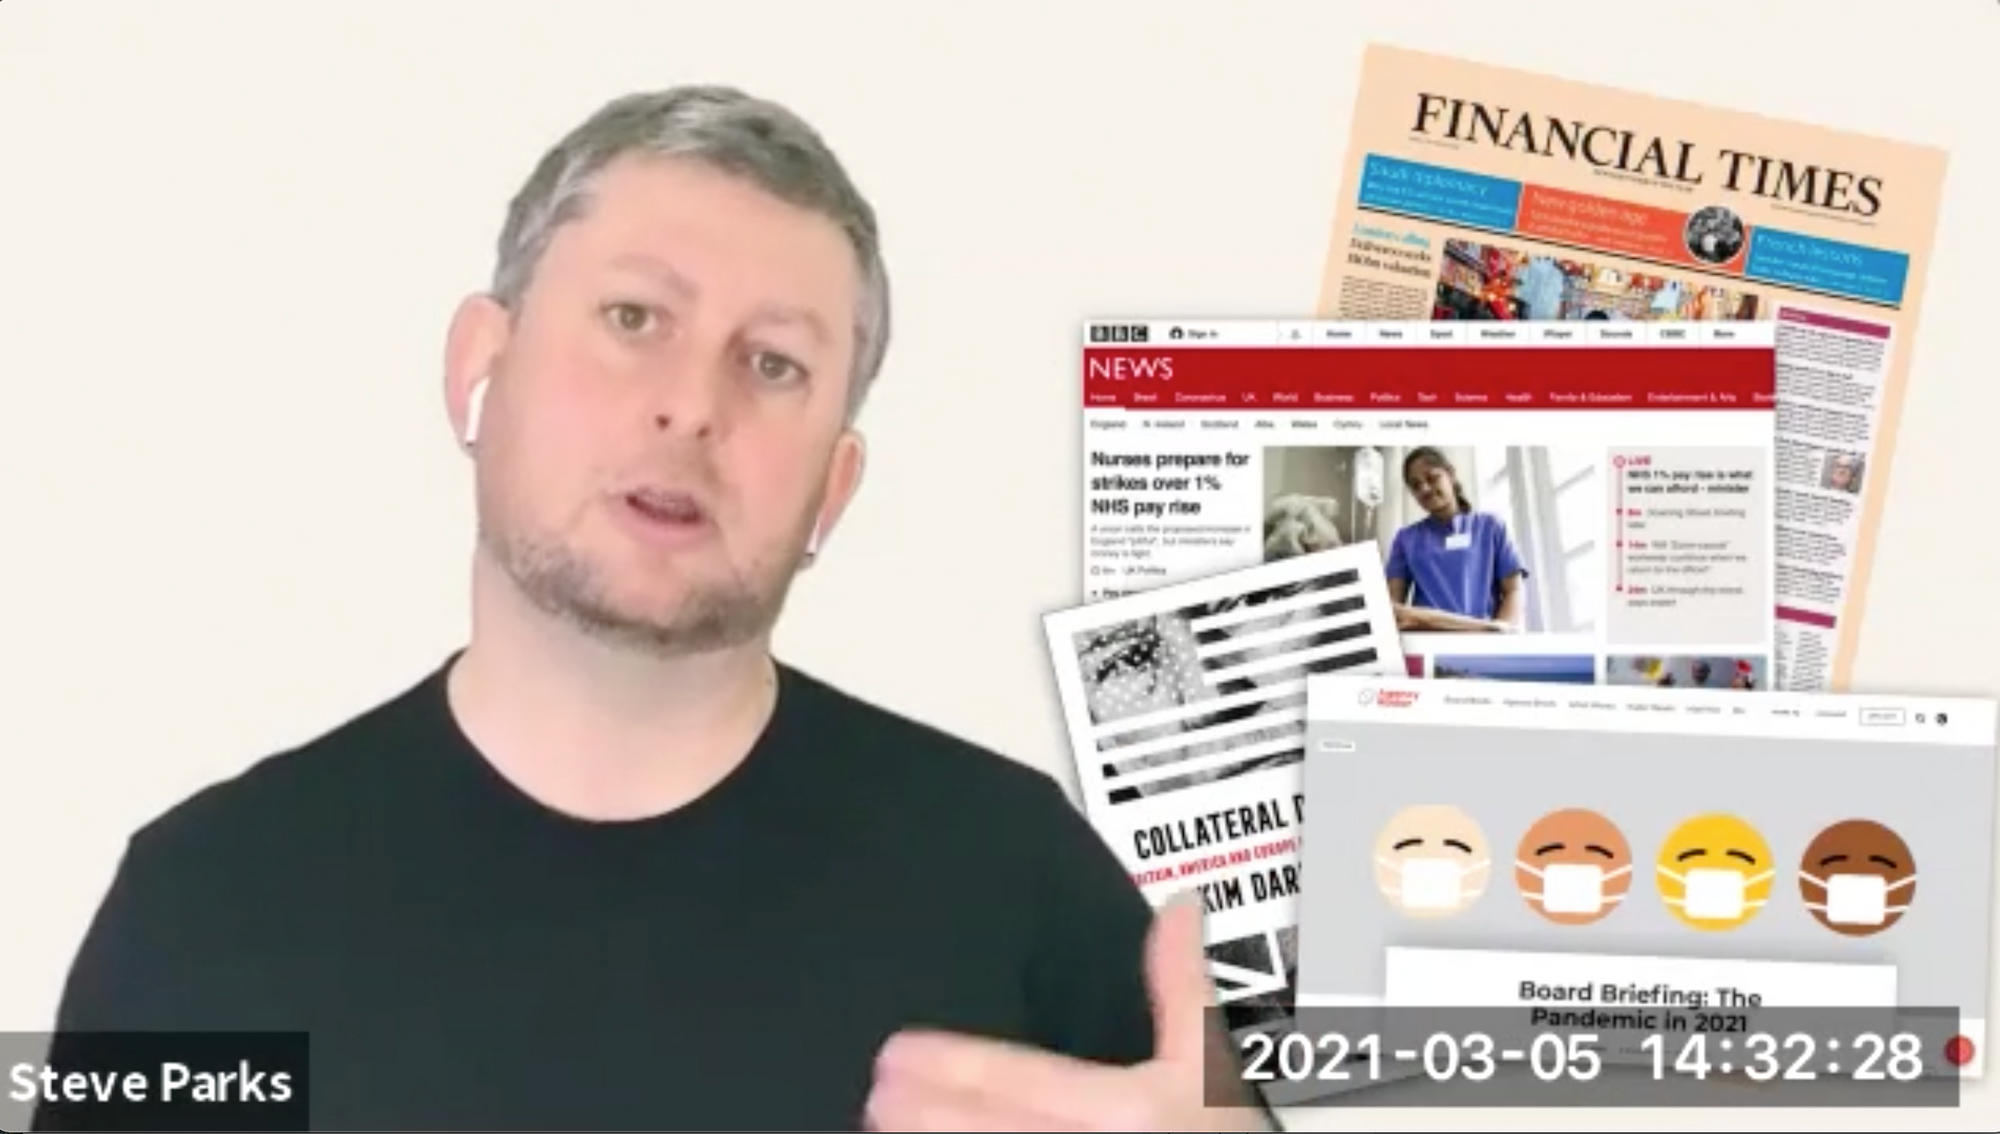

It's worth remembering that although this post is about how this presentation style was achieved technically, the technical gubbins of a presentation are only in support of the message. What you say and what goes on your slides are much more important than this, so still keep the bulk of your preparation time on the content rather than the tech.
But with a little bit of know-how like this, it's possible to make a standard videocall presentation be a little more engaging and personal. Happy zooming!
Finally, here's the video of the session: